Create Your Own OpenAI Powered Chatbot in React within 30 minutes.
In this tutorial, we will explore how to build a simple user interface that leverages the OpenAI HTTP API in conjunction with React. The application we will create enables users to ask questions and receive completed responses using OpenAI’s natural language processing technology, much like the experience of interacting with a ChatGPT session.
We will walk through the simple steps to build an intelligent text completion application with OpenAI API and React. These steps include:,
Obtain an API key from OpenAI platform
Create a react application with create-react-app
Install axios for simplifying the network (and later can be used with react-query) logic
Preparing the necessary parameters for the OpenAI HTTP call.
Sending HTTP requests and receiving responses from the OpenAI API
Building a basic user interface to display the completed text and interact with the user
All of these steps are straightforward and require only basic knowledge of React and JavaScript. Let’s dive right in and start building our app!
Get API Key for OpenAPI
If you are a current user of ChatGPT, obtaining an API key for the OpenAI platform is a straightforward process. And if you don’t, you will need a phone to receive the code (you might need a bank account if you need to use it for business. But for our purpose of this tutorial, that’s not required).
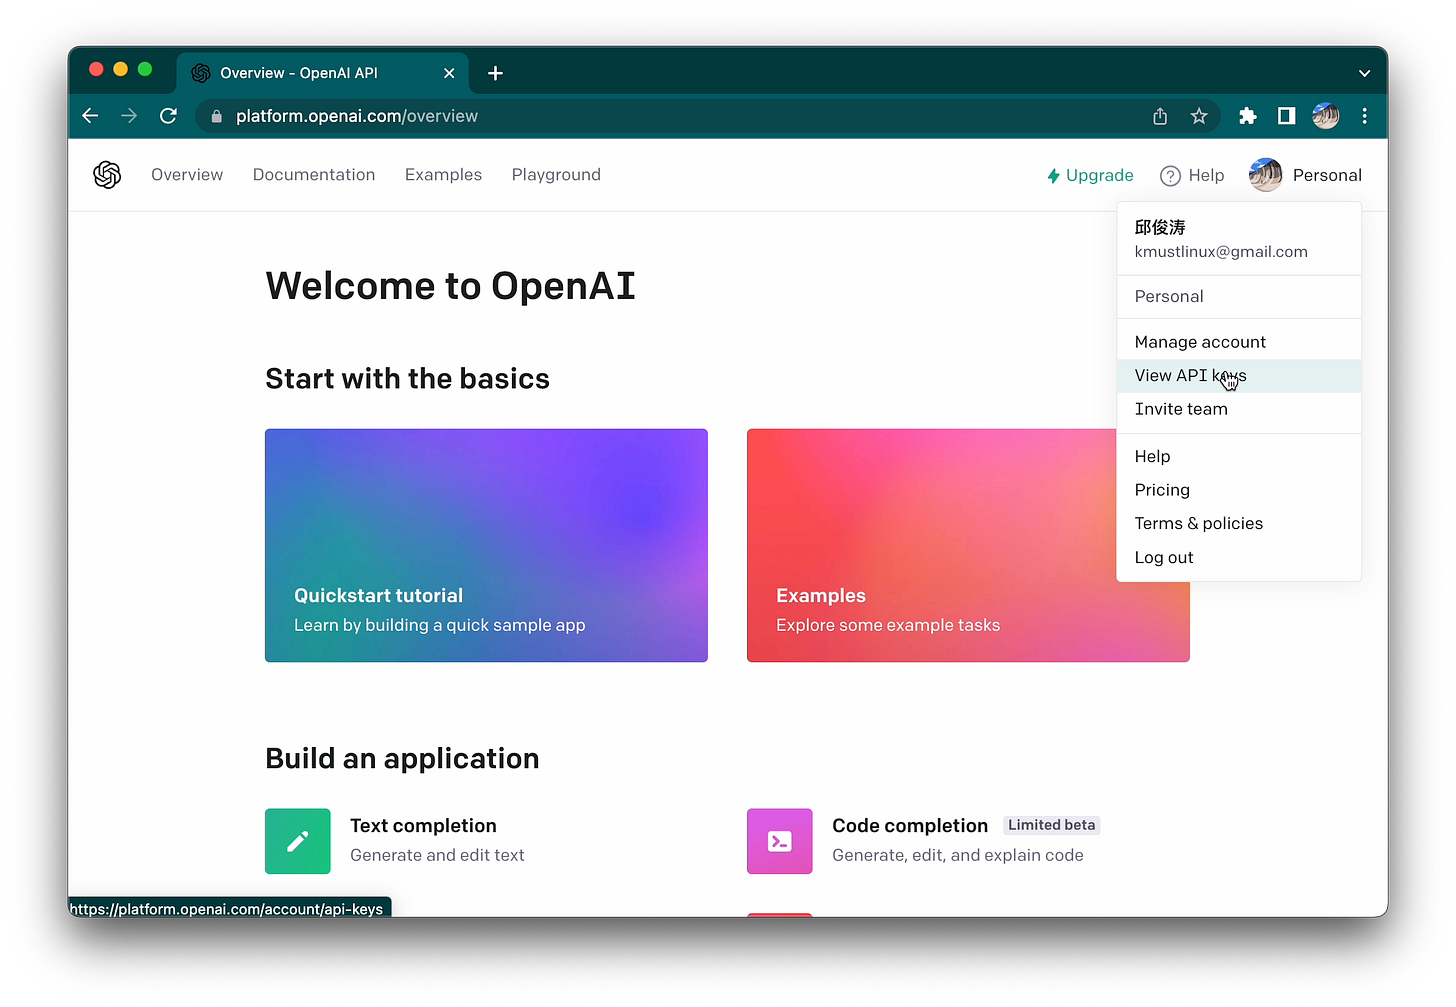
Navigate to the OpenAI website at https://platform.openai.com/ and click the Profile button in the top right corner. In the dropdown menu that appears, select “View API keys” to access any existing API keys associated with your account.
If you do not have an existing API key or need to generate a new one, this can be done easily within the OpenAI platform.
Copy that hash-like key from the popup before you close it, and keep it somewhere secret. And you’ve completed 50% already.
Create a React application
Firstly, let’s create an empty application called chatty with create-react-app:
npx create-react-app chatty --template typescriptThat will create a folder chatty and put all the dependencies into it. After that, you will need to install axios for simplify network logic.
cd chatty
npm install axios --save
And then you can launch your empty application :
npm startPrepare parameters for the HTTP call
Now, let’s prepare the parameters needed to call the API. As we want OpenAI to give us suggestions, we will need this endpoint:
https://api.openai.com/v1/completionsIt requires a few parameters:
{
  prompt: `Complete this sentence: "${input}"`,
  model: model,
  max_tokens: 50,
  n: 1,
  stop: ".",
}
The prompt is used as a starting point or a context for generating the response. There are many models provided. It’s the core algorithm of the ChatGPT and is trained with different mechanisms and datasets.
We’ll use text-davinci-002 here for our simple task. tokens are just words split by space or other punctuation (not exactly, but for the sake this article, let’s assume that’s true). And the stop parameter is a string representing a sequence of tokens that, if generated by the API, will signal that the generation should stop.
And with the parameter, we’ll also need some HTTP header (to carry the token and data format information)
{
  "Content-Type": "application/json",
  Authorization: `Bearer ${API_KEY}`,
}
Please note to replace the API_KEY with the one you copied from the first step - please do NOT commit it into your codebase, and never push it to the remote git repo.
Make the network request
So let’s put the above theory together into a function:
const fetchData = async (input: string) => {
  const response = await axios.post(
    "https://api.openai.com/v1/completions",
    {
      prompt: `Complete this sentence: "${input}"`,
      model: model,
      max_tokens: 50,
      n: 1,
      stop: ".",
    },
    {
      headers: {
        "Content-Type": "application/json",
        Authorization: `Bearer ${API_KEY}`,
      },
    }
  );

  return response.data.choices[0].text;
};
Please note that the data returned from the server may have multiple items. We will always pick up the first in the list and use the textfield of it.
Build a simple UI
This is a get-started tutorial so I won’t dive too deep into the fancy user interface. Let’s put a simple input and a button:
function ChattyApp() {
  const [input, setInput] = useState("");
  const [completedSentence, setCompletedSentence] = useState("");

  async function handleClick() {
    try {
      const completedSentence = await fetchData(input);
      setCompletedSentence(completedSentence);
    } catch (error) {
      console.error(error);
    }
  }

  return (
    <div className="container">
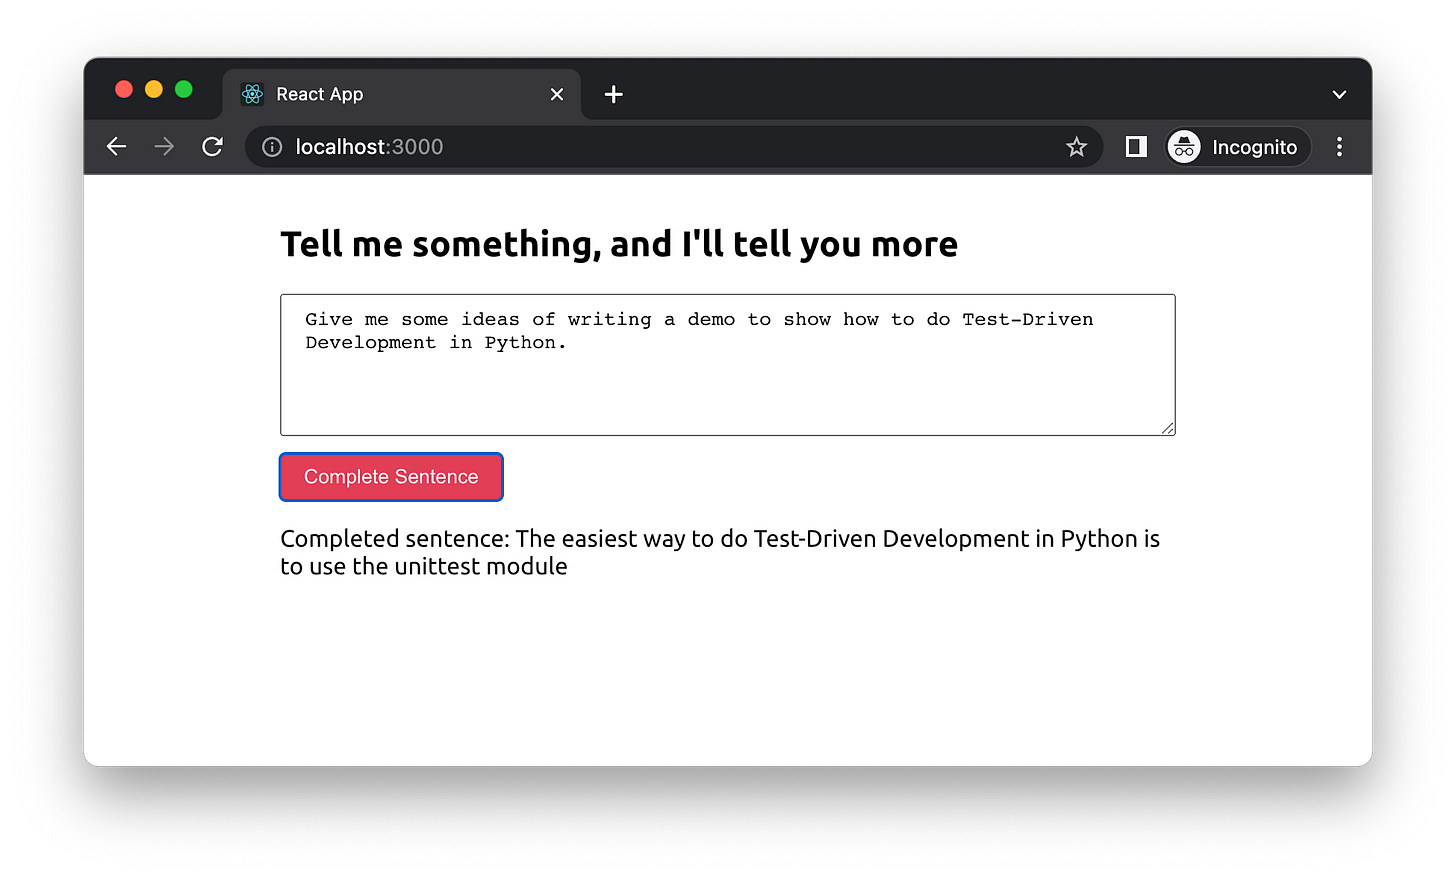
      <h2>Tell me something, and I'll tell you more</h2>
      <textarea
        value={input}
        onChange={(event) => setInput(event.target.value)}
        rows={5}
        placeholder="Type in some words and I'll finish the rest..."
      />
      <button className="button" onClick={handleClick}>Complete Sentence</button>
      {completedSentence && <p>Completed sentence: {completedSentence}</p>}
    </div>
  );
}
Put them together
Now that we have all the necessary components in place, let’s combine them and test out our application by asking it some questions.
If you inspect the network response, you may discover additional information that you wish to visualize within your UI. However, I will leave this exploration to you.
Summary
This is a rapid setup-and-run tutorial. We demonstrated how to build a simple text completion application using the OpenAI API and React. We walked through creating an API key and integrating the API with a React application using the axios library. We then showed how to use the API to generate text completions based on user input and how to display the results in the React app.
I am continually learning and striving to improve my content, so please stay tuned for additional articles and updates on this topic.
Create Your Own OpenAI Powered Chatbot in React within 30 minutes. was originally published in ITNEXT on Medium, where people are continuing the conversation by highlighting and responding to this story.


